Katie's Shroomtastic Glowing DIY SKin
January 22, 2024
Written By Katie Polansky, lunchbox team member
Find Me: TikTok | Instagram | YouTube

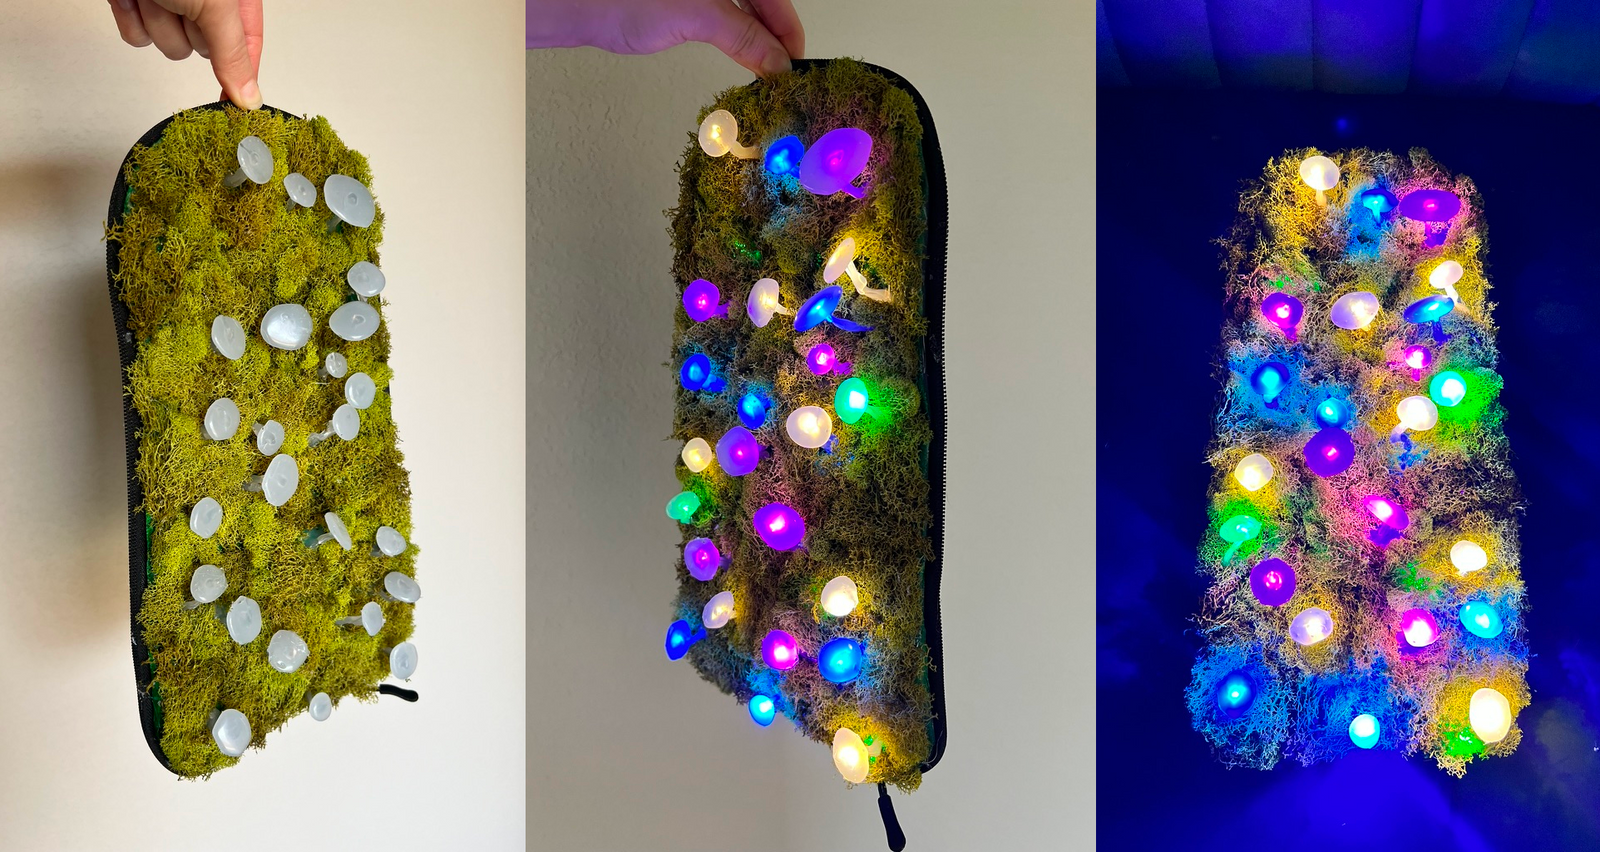
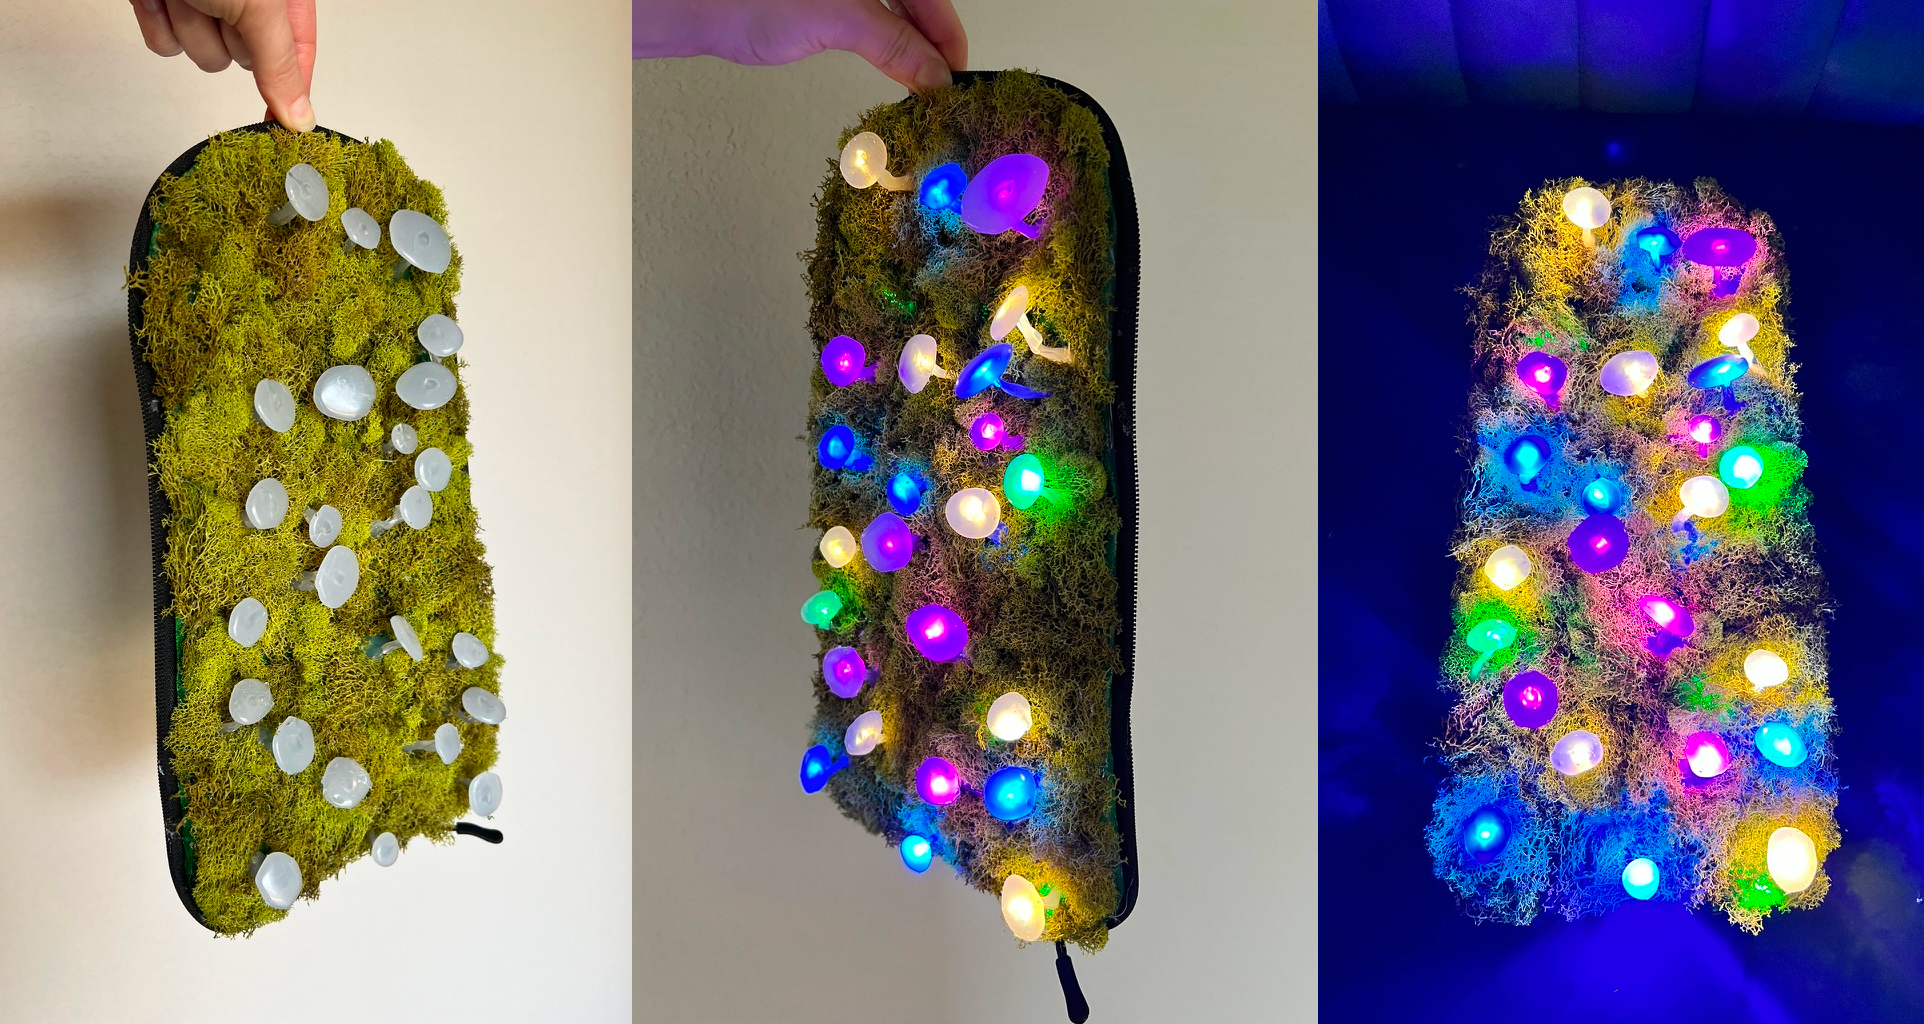
The light up mushroom DIY Skin was inspired by a few different outlets, though one in particular stands above the rest. Stumbling across the bioluminescent mushrooms at Electric Forest 2023 was one of my favorite memories of exploring the forest. I loved them so much that I wanted to recreate them in my own style. After seeing other creatives post their mossy DIY skins in the LB Facebook group, I chose to wear mine on my lunchbox hydration pack as well.
Materials Needed:
- Lunchbox DIY Skin
- Hot Glue Gun
- Hot Glue Sticks
- “Fairy” led lights - minimum of 10ft long
- Faux Moss
- Parchment Paper
Suggested, but not Required Materials:
- Green Acrylic paint for Under
- Paint Brushes
- Patch of Fabric for Battery Pack Pocket
- Sewing Kit
- Mediocre Sewing Skills
@lunchboxpacks check out this amazing DIY by @katie | diys + anime 🍄✨ #lunchboxfam #lunchbox #edmtiktok #ravetok #hydrationpack #festivalfashion #diy ♬ When I'm Gone (feat. XAELO) (Ganja White Night Remix) - PEEKABOO
Step by Step:
- Test your LED fairy lights to ensure your chosen set lights up.
- If using fairy lights powered by a battery pack, sew a pocket on back of the DIY skin to fit battery pack inside.
- Prep front of DIY Skin by painting with green acrylic paint. Set aside to dry. This step is not required but suggested.
- Lay parchment paper on flat surface. Use hot glue gun to create various sized circles with hot glue for the mushroom “caps” or tops. Make more than you think you’ll need, and make a few different sizes. Set aside to cool.
- Once DIY skin is done drying (if you chose to paint a base color), string your fairy lights on diy skin and secure using hot glue. To create the mushroom stems, alternate the led bulbs to be the first bulb as a “peak” (aka a mushroom stem) and next bulb as a “valley” (to be hidden below moss). Using this peaks and valleys method, you will be able to spread the lights around the entire skin and reduce crowding. Continue this method until your whole skin is covered or you use up your LED string.
- When the string is nice and secure on your DIY skin, use hot glue to cover the “peaks”, creating the stems of the mushrooms. Ensure each upward peak of string is covered by hot glue.
- Once all of your stems have dried, peel off your mushroom caps from the parchment paper and use hot glue to secure the caps to the mushroom stems.
- Once all of your mushrooms are completed, cover the base of the DIY skin with project moss and hot glue to hide the LED string’s “valleys”.
- Turn on your lights and admire your work!