Maggie's Perler Pin Skin
July 18, 2023
Written by Maggie Chan, lunchbox fam member
Hello again, Lunchbox fam! This is Maggie C and I am back with a brand new skin idea that is perfect as a Pin Skin custom insert. This project is made out of fuse beads and light show wires sewn together with fishing line!
Materials Needed:
- Lunchbox Pin Skin
- 2 square fuse bead pegboards, connected
- Fuse beads in both solid and translucent colors, enough to fill the majority of both pegboards
- Wax paper/fuse bead melting paper
- Iron
- 1 or 2 Lightshow Wires with battery pack and splitter if using more than 1 wire, preferably white or light colored.
- Fishing line
- Metal needle
- Scissors
- Tape
Optional:
- Black light flashlight, if working with light reactive beads
- Duct tape
- Small needle-nose pliers
- Sheet of white paper
1. Plan the Design Size

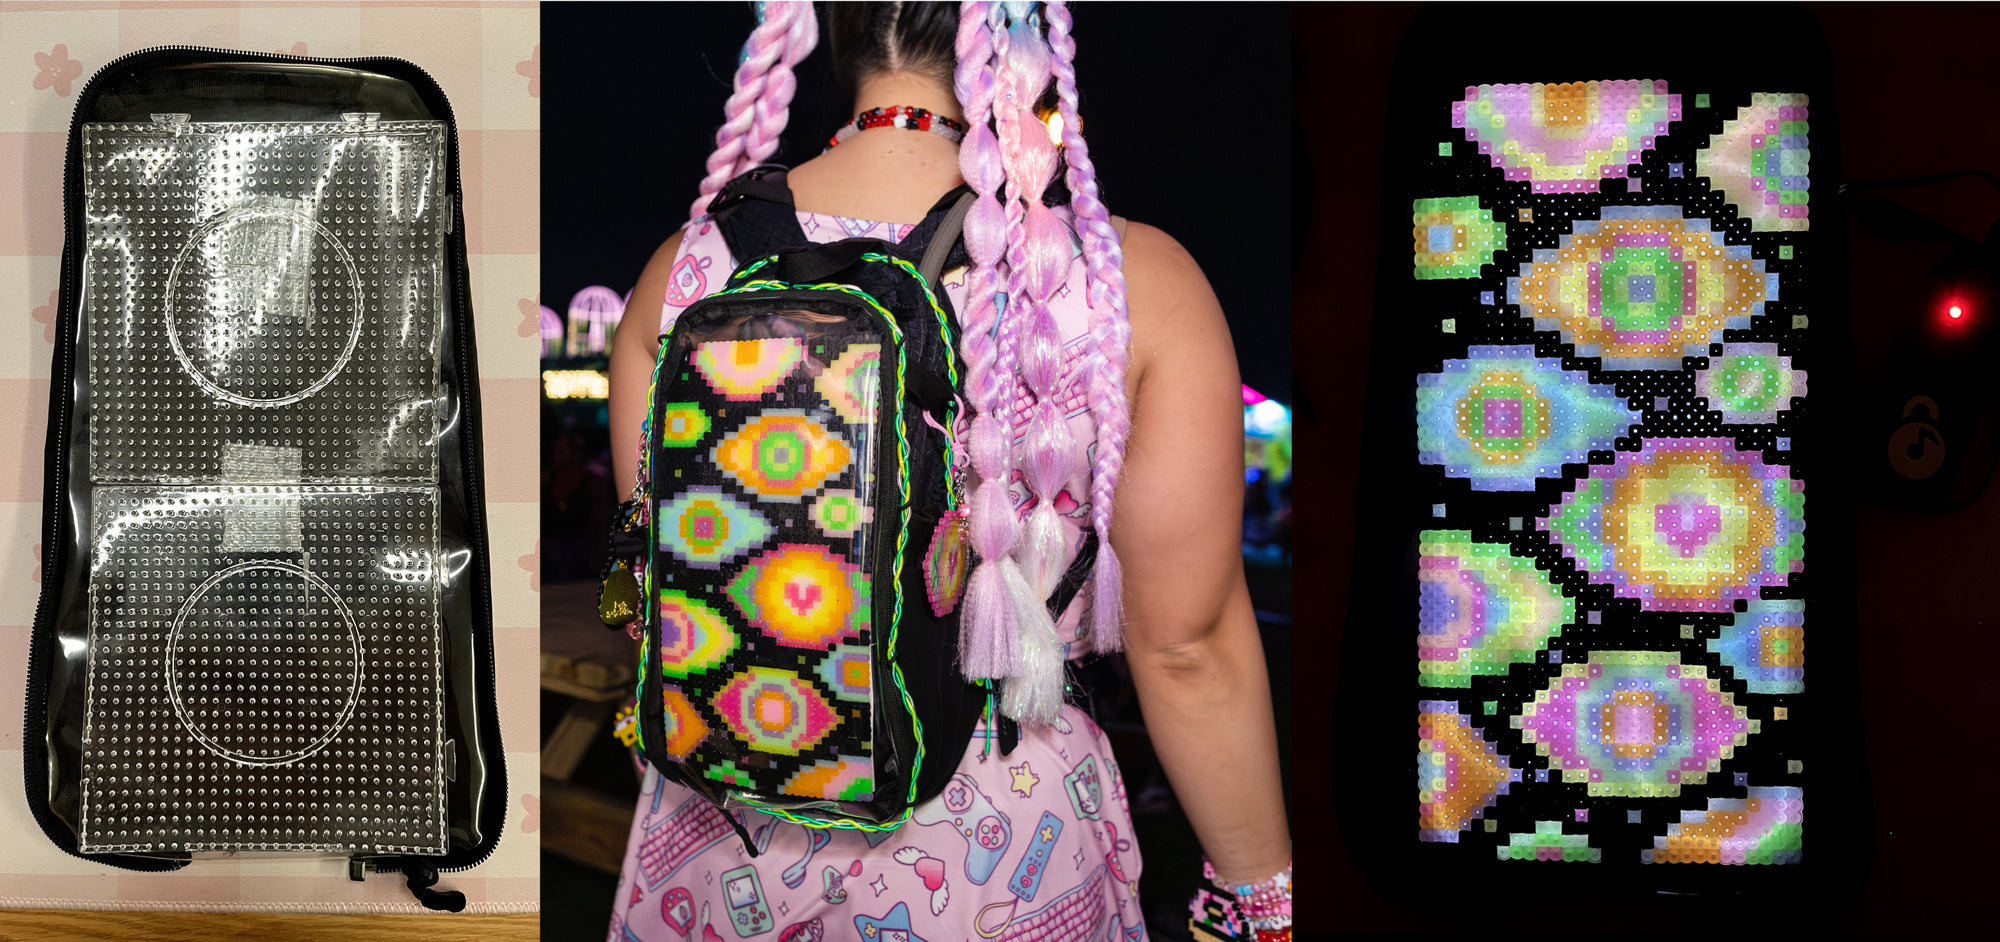
Start off by measuring your square fuse bead pegboards against your Pin Skin to see how the design will fit inside. There will be extra space at the top and sides of the skin, but if you want to center and secure it, you can attach your final product to the Pin Skin insert. Pro tip: Make your design more narrow at the top as well as rounded on all corners, or else you may have trouble fitting the finished product into the skin without cutting the skin (which is what I ended up doing).
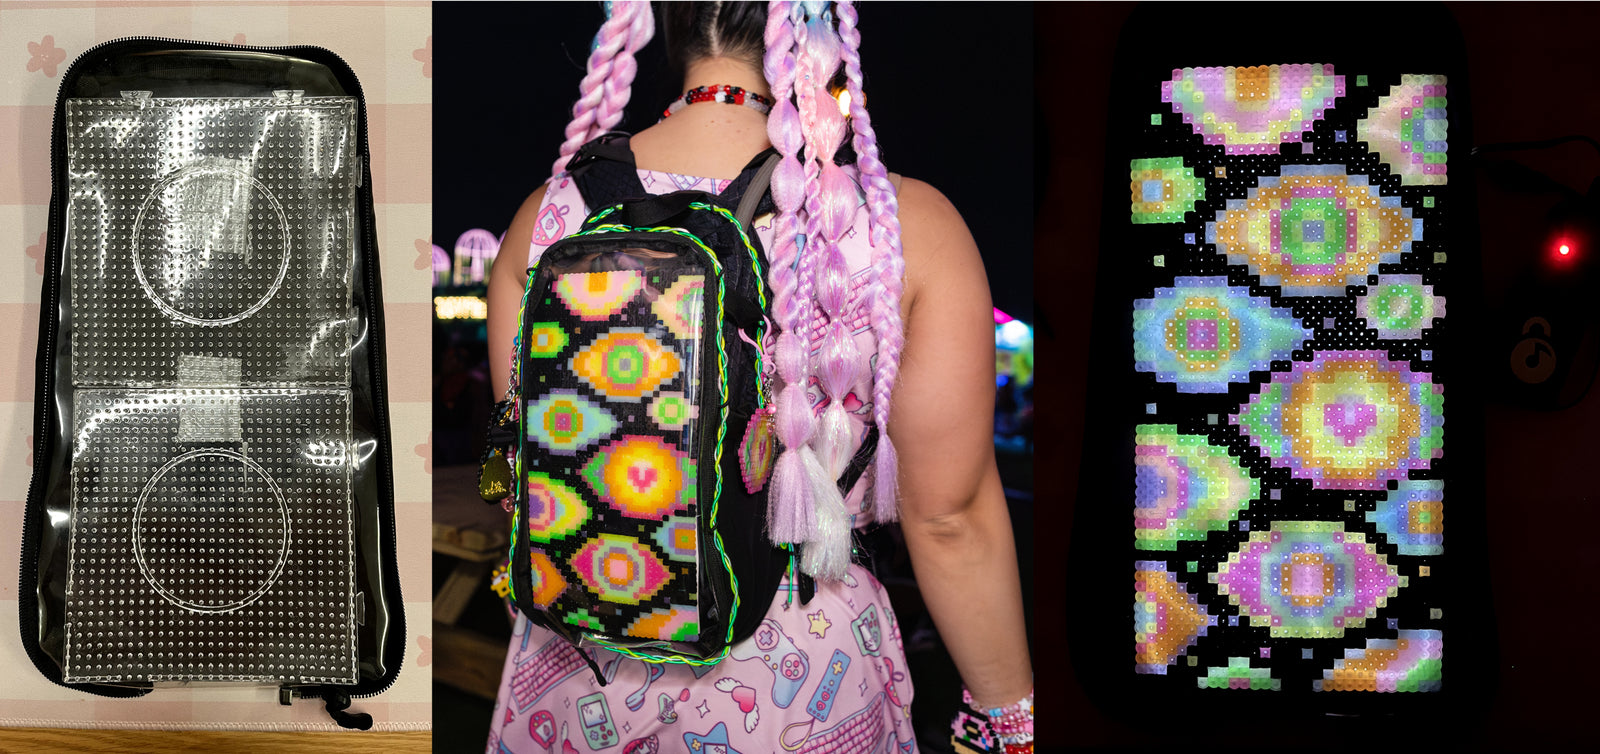
2. Create Your Unique Design

I freehanded the EDC Las Vegas 2023 “Awakening” eyes in multiple glow-in-the-dark/blacklight-reactive colors before outlining and filling in the spaces with solid black beads for maximum contrast. Optionally, turn off your lights periodically and use your black light flashlight to see how the glow beads look and determine if you want to adjust the contrast in your design to make certain elements pop.
3. Fuse Your Beads
On a heat-safe surface, I set my iron to the hottest setting that I could handle, covered the entire piece with a sheet of wax paper, and melted the heck out of the design to make sure that it would not easily fall apart. Be sure to melt both sides thoroughly and let it cool while pressed between two flat surfaces so it won’t get wonky.
4. Check the Fit
After the design has cooled enough to handle it without warping, test how it fits into the Pin Skin. If you haven’t slimmed down your design at all, you will encounter the issue I faced with fitting the design into the Pin Skin back flaps. If you choose to continue with your full sized design, move on to step 5. If your design fits into the Pin Skin without issue, skip to step 6!
5. (Optional) Perform Surgery
Since we don’t want to compromise our fuse bead design size, we will perform surgery on our Pin Skin. Beware, this is a permanent modification! First, I decided I would make two cuts per side in order to fit the corners of my design. Before cutting, I laid down pieces of duct tape where I wanted to cut and folded them around the other side of the fabric. The tape will prevent fraying of the fabric and maintain some stability for the cut flaps. After the four pieces of tape are placed, cut the tape down the middle, but not all the way to the end of the tape. You will want to maintain some tape there to prevent fraying. Make one cut at a time and attempt to fit your design in before making deeper cuts. Stop cutting when your design fits into the skin.
6. Light It Up!
Now that the design fits into the Pin Skin, it’s time for sewing on the lightshow wires! Decide which side of your fuse bead design is the “backside”. Take one light wire and plan where you want the connector to end up. I put mine on the top left corner of the backside. Using tape I secured the connector to my work surface to hold it in place. Then, lay down and plan your wire pattern in a way that makes sense for your design. For my design, I went from left to right, top to bottom. Since I also wanted light for the edges of my design, I used a second lightshow wire to go around the border and then up and down the design from left to right. After planning the pattern, begin securing the wires one at a time using the needle and fishing line. If you have a tough time getting your needle through the hole because it is melted closed, use a needle-nose plier to force the point through and pull it out. (You can see the beating my needle took by the end). I tied finishing knots approximately every 1-2 inches of the design to make sure the wires laid flat and neat.
7. A Little Extra

I taped a piece of white paper to the backside for two reasons: 1) To create maximum effect as the light bounces off it to illuminate the design and 2) to protect and cover your lightshow wires from getting snagged as you insert and remove it from the Pin Skin.
8. Ready To Go


Put your fuse bead creation into the Pin Skin, connect it to the battery pack and place in inside the skin instead of the main pack compartment. Make sure that your back flaps are folded back in place neatly and they should keep everything together inside the Pin Skin. Turn on the lights and dance the night away!